Boost your brand visibility for millions of Amazon customers with the fast, familiar and secure Amazon.com checkout solution.
Why does Your Ecwid by Lightspeed Store needs Amazon Pay?
Keep customers engaged — from cart to finish: 37% percent of customers abandon a site because they're asked to create an account. With Amazon Pay, there's no need to create a new account or enter new information on your site.
Reduce chargebacks and fraudulent transactions: The Amazon brand is a proven winner of customer trust. Their advanced fraud protection is the same technology used on Amazon.com.
Grow your audience with co-marketing initiatives: The cost of acquiring new customers has increased by over 50% over the last five years. With Amazon Pay co-marketing programs, tap into Amazon's customer base of 200m+ global Prime customers.
Leverage the latest technology that customers love: Benefit from Amazon's ecommerce innovations, enable features like recurring payments, let customers shop with their voice using Alexa, and much more.
How I start?
Simply, by installing Amazon Pay for Ecwid by Lightspeed app. After that you just have to configure necessary fields for the integration and your shop is ready to use Amazon Pay.
More info & FREE TrialHow do I configure the app?
Get your Public Key ID
- Navigate to Amazon Pay Integration Central: US, EU, JP.
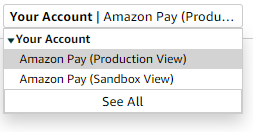
- Select "Production" option from the "Marketplace switcher" drop-down menu to generate a key
pair with access to the Production environment
- Identify as a "Self-developed" integration
- Select "Self-developed" option from the drop-down menu
- Use the default "One-time Payments, Single Authorization" payment type setting

- Click on the "Get instructions" button
- Create a client ID/store ID (if you already do not have one for your store website)
- Navigate to "Manage client ID/store ID(s)" section
- Click on the link "Create new client ID/store ID"
- Set "Application or store name". Example: "My Store Integration"
- Under 'JavaScript origins' add your store root url, for example https://www.example.com/
- Create a public/private key pair
- Navigate to the "API keys" section
- Click on the "Create keys" button
- Use the default "Generate API credentials" setting
- Name your API keys. Use a descriptive name, the name will be used to differentiate between multiple keys when you need to manage them in Integration Central. When naming the keys, you should consider who is using it and what they're using it for
- Click "Create keys" to create the public/private key pair
- Store the private key and Public Key ID
-
Creating the key pair will automatically download the private key (.pem) file to your browser, you do not need the public key. Save the private key file in a secure location, you will need it to access Amazon Pay APIs. You should never share your private key with anyone and this is the only time that you will be able to download the private key file. If you lose access to your private key, you must generate a new key pair
-
Store your Public Key ID, you will need it to access Amazon Pay APIs. Unlike the private key file, you can return to this page at a later time to access your Public Key ID
-
- Add domains to Seller Central (as mentioned here, only if you skipped the step 4.)
- Navigate to Integration central -> Manage Client/Store ID configurations
- Choose the 'App or store name' you want to modify
- Click 'Edit'
- Under 'JavaScript origins' add your store root url, for example https://www.example.com/
- Click 'Save changes'
Set data within the Dashboard of Amazon Pay for Ecwid by Lightspeed App
-
Since you have all necessary data which you can read from Integration Central, copy/paste
the following:
- Merchant ID
- Store ID
- Public Key ID
- Open the auto downloaded private key (.pem) file in text editor or browser and copy entire content to Private Key ID field.
-
Make sure to also fill in the following fields:
- Region
- Cart page link (your store cart page link) for example https://www.example.com/cart
- Check all data
- Click on the Save button
- You are all set