Viva Wallet is a Principal Member of Visa and Mastercard for acquiring and issuing services.
Viva Wallet provides businesses of all sizes card acceptance services through the innovative Viva Wallet POS app, add-on Google Play devices and through advanced payment gateways in online stores. It also offers business accounts with local IBAN and a business Viva Wallet Mastercard card.
Why does Your Ecwid by Lightspeed Store needs VivaWallet?
Conversion increase by up to 21%: Increase your online store's conversion rates by enabling your customers to process their payments in less than 30 seconds.
Constantly self-updated: Further improve conversion with regular automatic updates, which continuously enrich your checkout with new payment methods.
Security & Compliance: With advanced fraud protection using Machine Learning algorithms and compliance aligned with regulatory & security rules (PSD2, SCA/3DS, PCI, etc.), your checkout is secure and fully compliant.
Superior to API-based checkouts: The Smart Checkout offers unique features across merchants, countries and payment methods, that an API-based checkout cannot.
How I start?
Simply, by installing VivaWallet for Ecwid by Lightspeed app. After that you just have to configure necessary fields for the integration and your shop is ready to use VivaWallet.
More info & FREE TrialHow do I configure the app?
Get your Merchant ID, API Key, Client ID and Secret ID
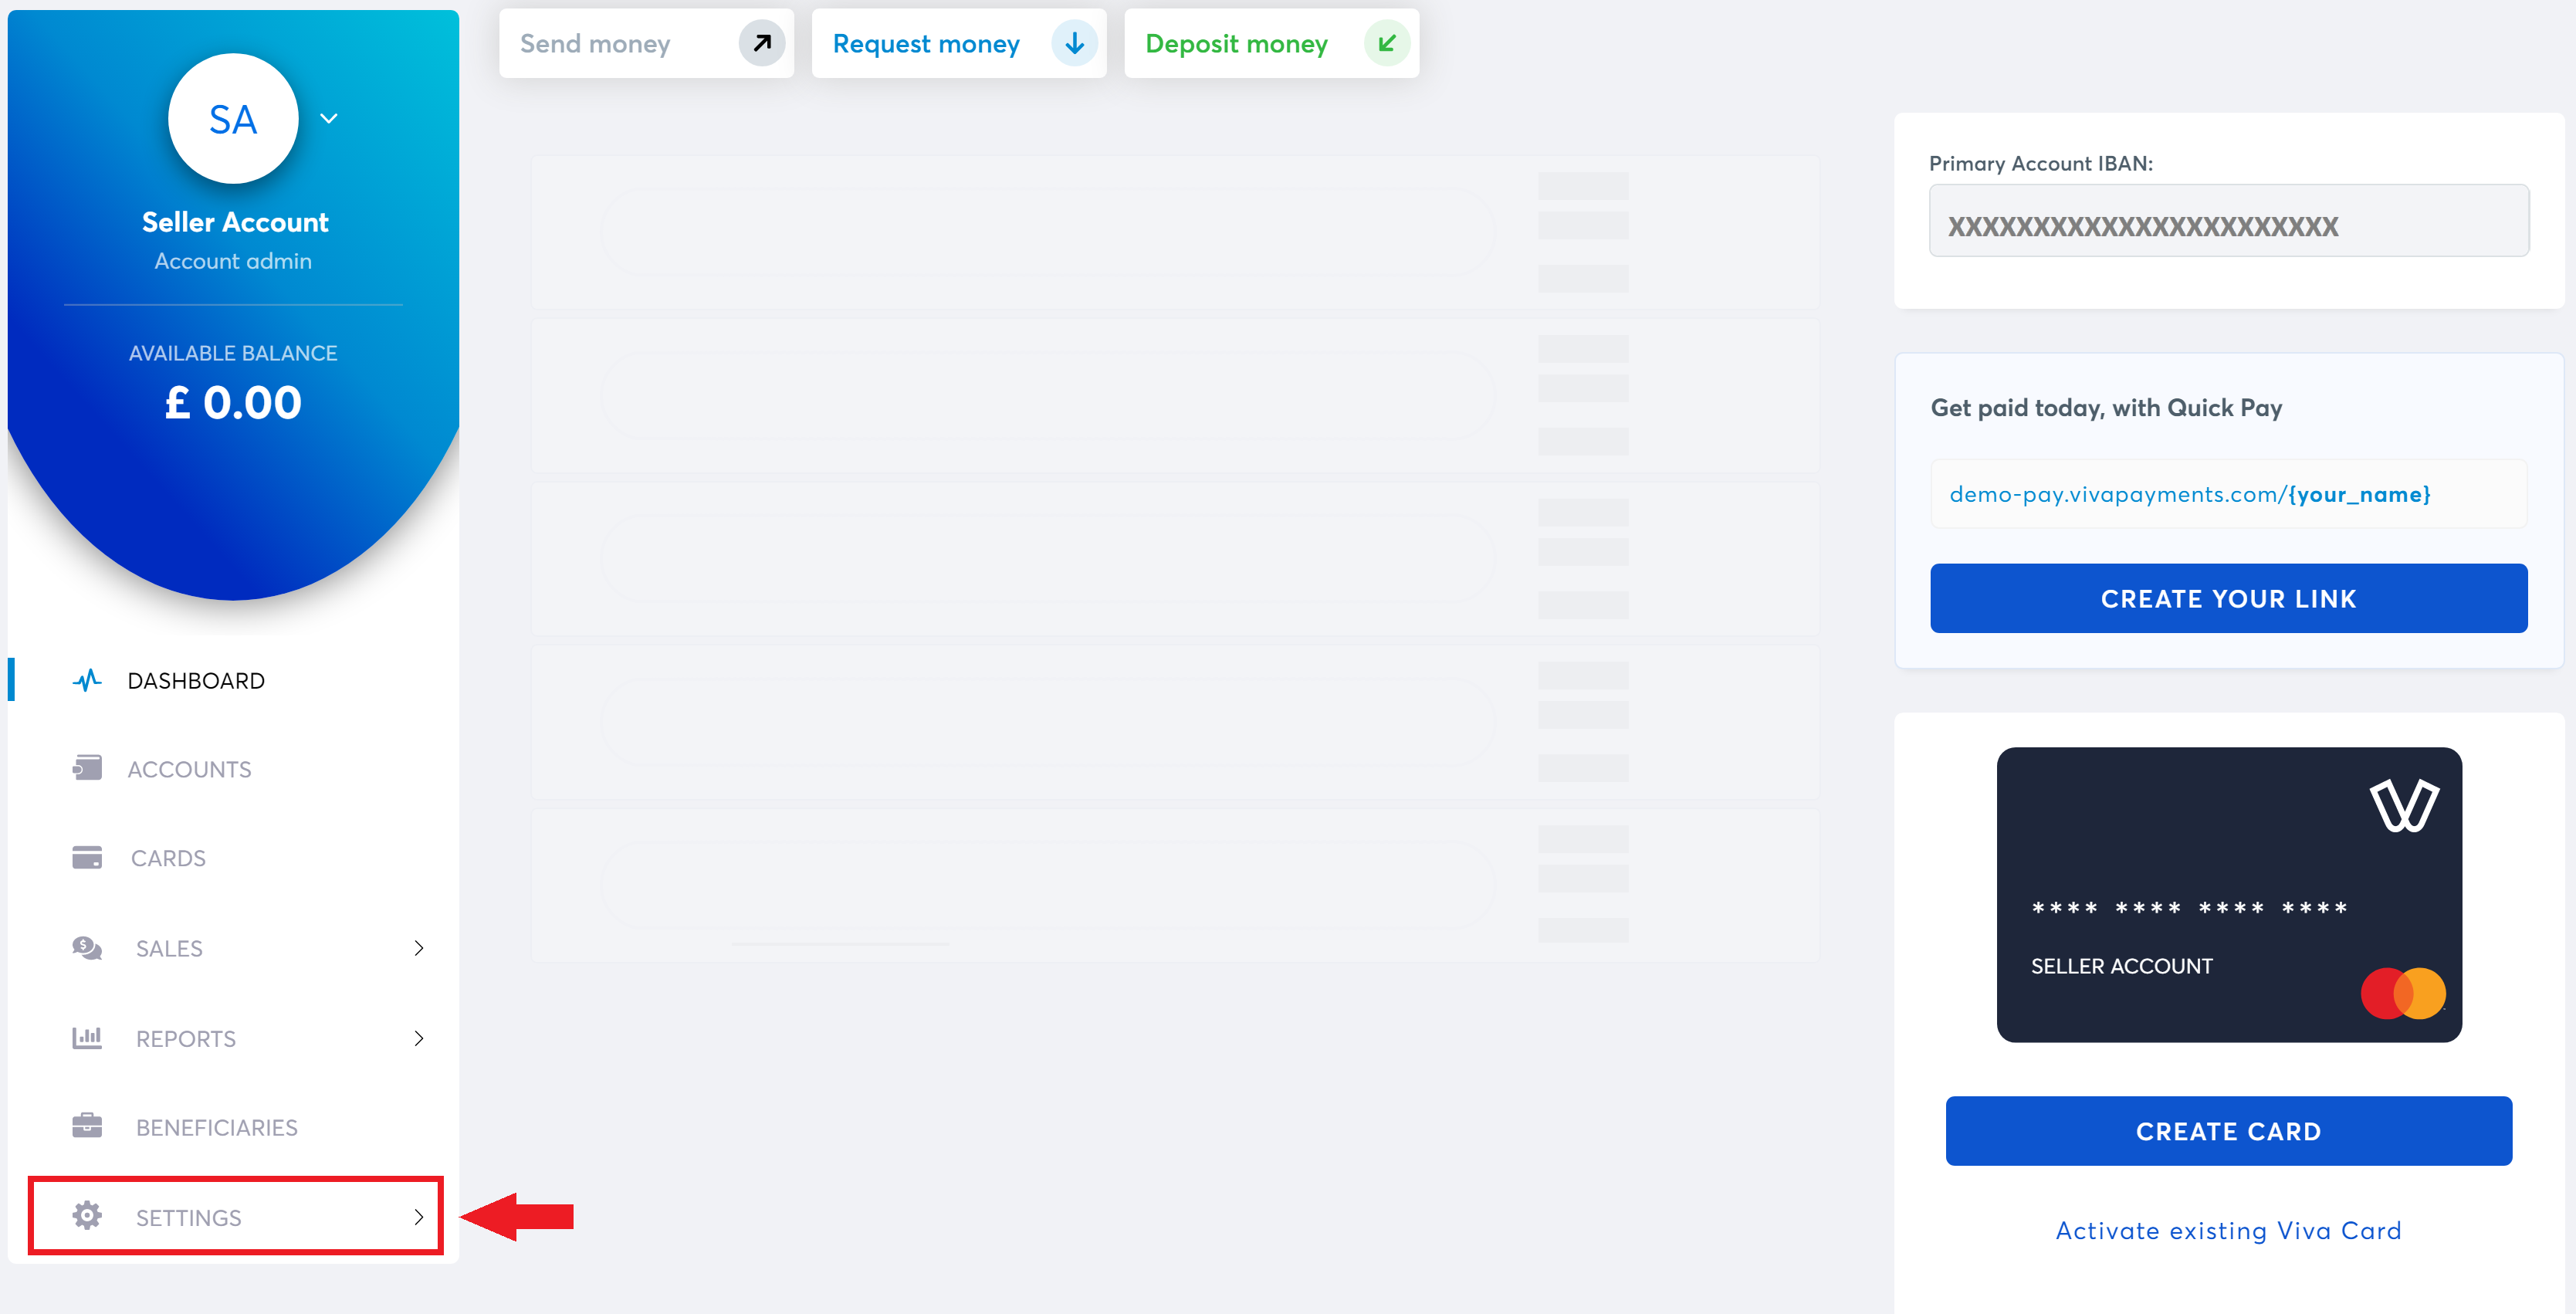
- Log into your VivaWallet portal
-
Navigate to "Settings" -> "API Access"
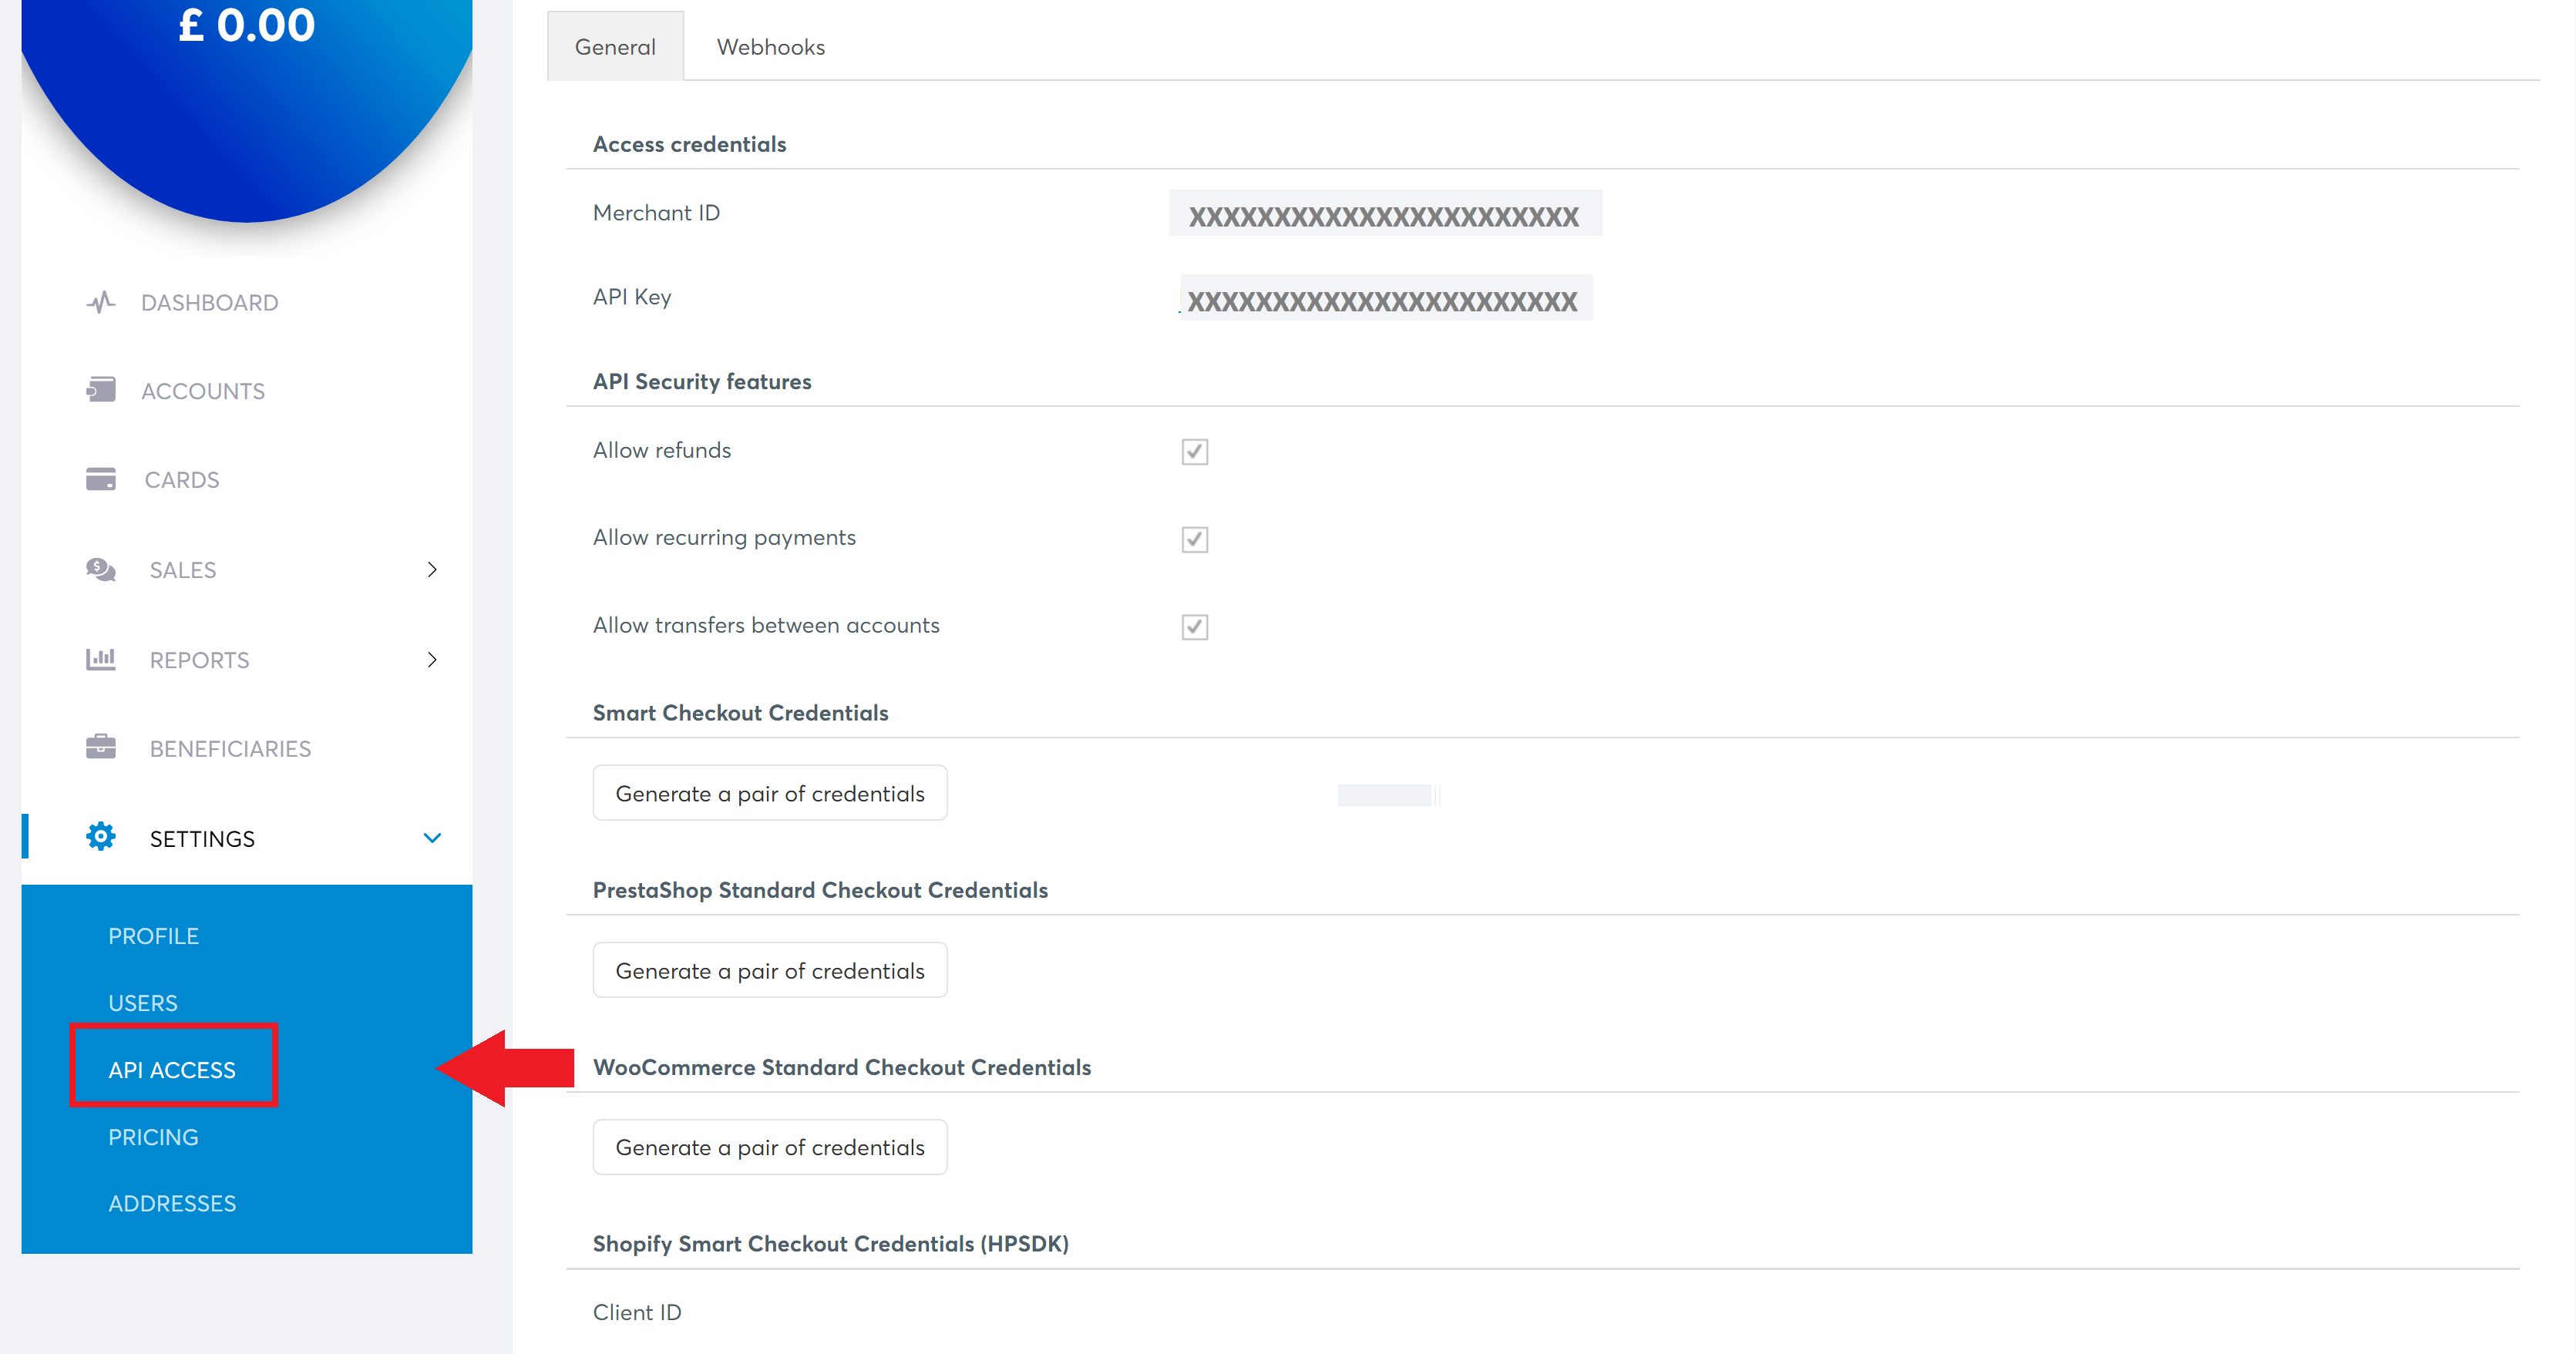
- Locate "Smart Checkout Credentials"
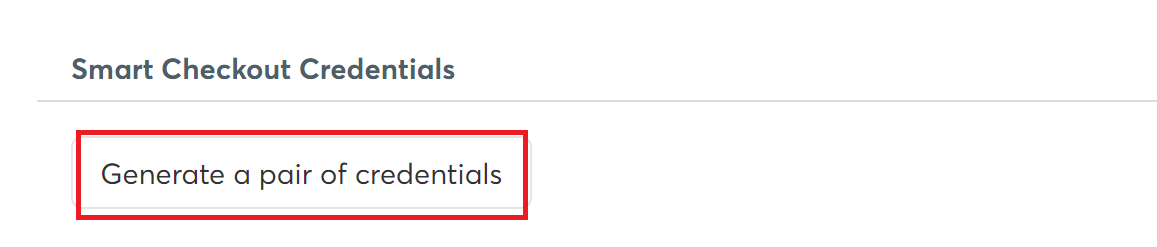
- If you have never used the "Smart Checkout Credentials", then click on the button "Generate a pair of credentials". This will open a popup with your Secret ID. Make sure to copy it, as you will not be able to see it again.
- If you have used the "Smart Checkout Credentials" before, then you will already see your Client ID
- Copy the Merchant ID, API Key, Client ID and Secret ID
- Navigate to the Ecwid by Lightspeed VivaWallet app dashboard and paste the Merchant ID, API Key, Client ID and Secret ID into respective fields.
Need more help? Check the official tutorial.
Create a Payment Source
-
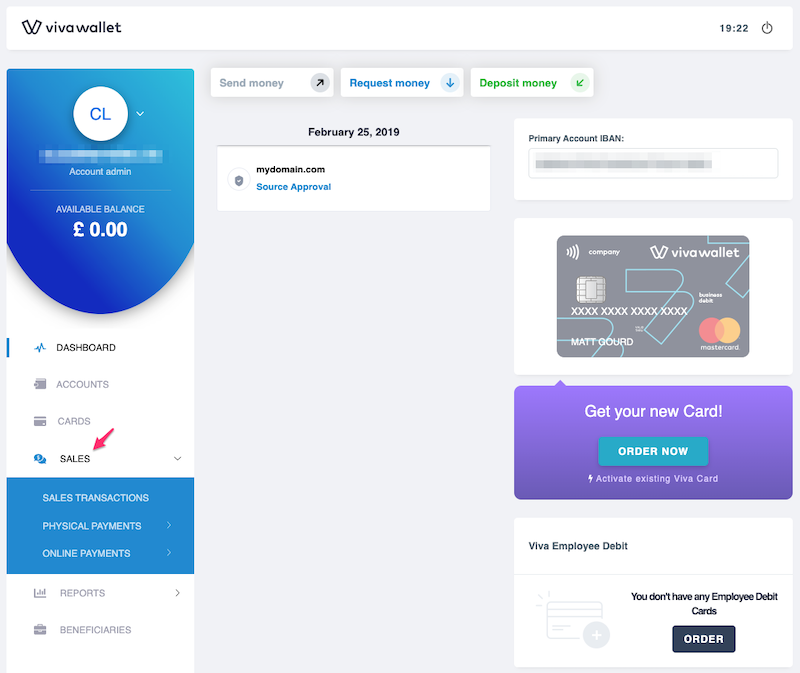
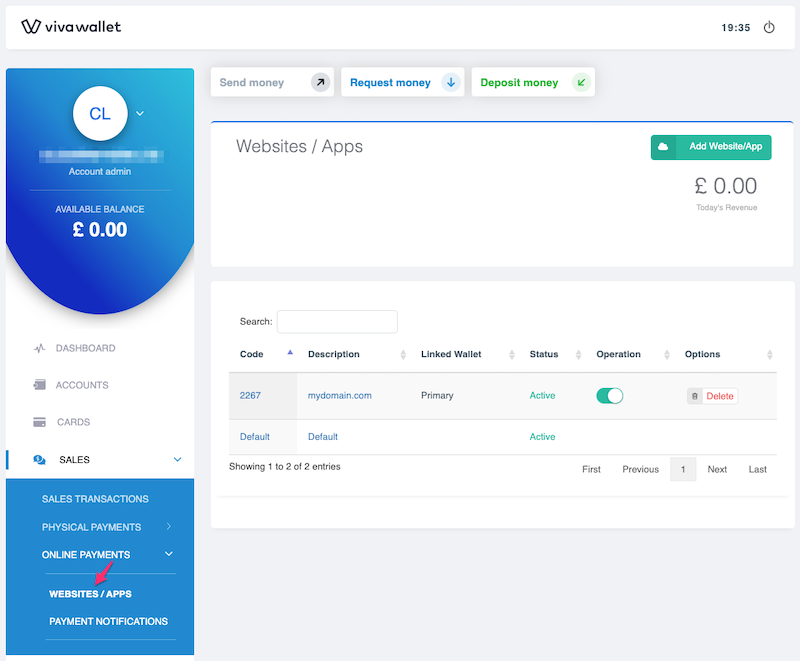
Navigate to "Sales" -> "Online Payments" -> "Websites/Apps"
-
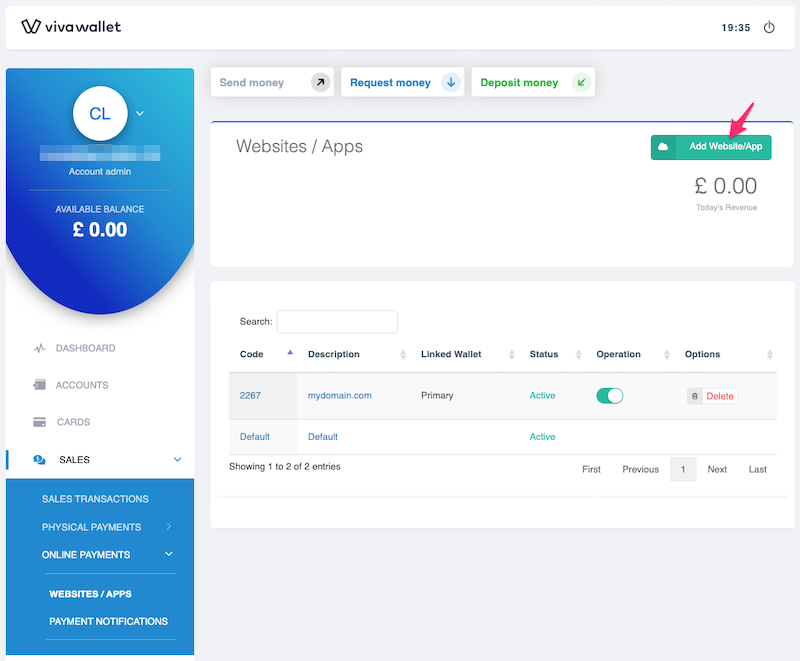
Click on "Add Website/App" button in the top right-hand corner
-
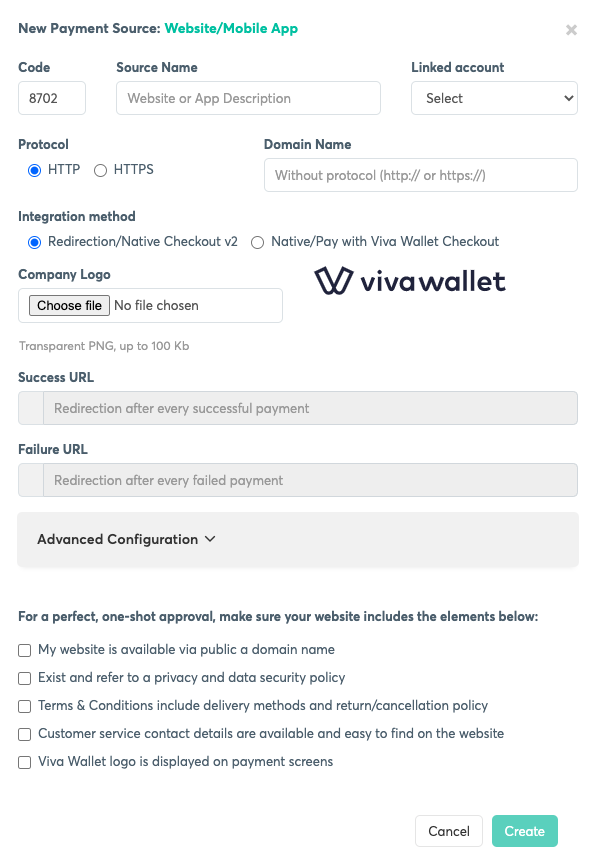
The New Payment Source dialog box is displayed:
-
Complete the fields as follows:
- Code - The four-digit number at the top-left of the dialog box is the "Source Code" - the unique code of this payment source. This code is automatically generated, but you can choose a different value if preferred (for organisational purposes, for example). If you are utilising our Payment API, this code is passed within the sourceCode parameter when creating a payment order.
- Source Name - In addition to the Source Code, you can also give your payment source a name. This allows you to more easily recognise the source within your account and within reports (for example, the Sales Clearance report).
- Linked account - Choose which account (wallet) to link this payment source to. When this payment source is used, funds will be deposited into the chosen account. You can link several different sources to one account, if desired.
- Protocol - If your e-commerce platform uses SSL on the checkout, select https. If your platform does not use SSL (as is the case with some development environments, for example), use http.
- Domain Name - Enter the domain to be associated with this payment source. You do not need to add the trailing slash (\) or the protocol (http:// or https://). For example:
- If your site uses www: www.yourdomain.com
- If your site doesn't use www: yourdomain.com
- Integration method - Leave this as Redirection/Native Checkout v2.
- Company Logo - Upload your company logo to be associated with this payment source, in Transparent PNG format up to 100KB in size (suggested: 128 x 128 pixels). This is an important step as the logo will be displayed on your payment page, helping customers identify and validate your company.
- Success URL - This is the URL of the page the customer will be directed to upon
a successful payment. Here, you need to put only
?viva=success
- If you use some sort of Ecwid integration (via Wordpress, Duda, Wix or some
other platform) it might be possible that you are not loading the store on
your home page. In that case, navigate to your cart page and copy everything
after domain host and /. Example:
yourdomain.com/my_cart_page and paste that part like this: my_cart_page?viva=success
- If you use some sort of Ecwid integration (via Wordpress, Duda, Wix or some
other platform) it might be possible that you are not loading the store on
your home page. In that case, navigate to your cart page and copy everything
after domain host and /. Example:
- Failure URL - This is the URL of the page the customer will be directed to upon
an unsuccessful payment. Here, you need to put only
?viva=fail
- If you use some sort of Ecwid integration (via Wordpress, Duda, Wix or some
other platform) it might be possible that you are not loading the store on
your home page. In that case, navigate to your cart page and copy everything
after domain host and /. Example:
yourdomain.com/my_cart_page and paste that part like this: my_cart_page?viva=fail
- If you use some sort of Ecwid integration (via Wordpress, Duda, Wix or some
other platform) it might be possible that you are not loading the store on
your home page. In that case, navigate to your cart page and copy everything
after domain host and /. Example:
- Advanced Configuration - If you use some sort of Ecwid integration (via Wordpress, Duda, Wix or some other platform), you need to open the Advanced Configuration section and update Order Code field. Instead of a default s insert sid instead.
- Finally, read the information against each of the checkboxes at the bottom of the screen. You will need to agree to these in order to create the payment source. Once you have checked all of these, click on the Create button to complete the process.
- Copy the Source Code
- Navigate to the Ecwid by Lightspeed VivaWallet app dashboard and paste the Source Code into respective field.
- Check all data within the Ecwid by Lightspeed VivaWallet app dashboard
- Click on the blue "Save" button within the Ecwid by Lightspeed VivaWallet app dashboard
- You are all set
Need more help? Check the official tutorial.
Create a Webhook connection: Recommended
Sometimes a Viva Wallet callback may have network issues and because of that the order is not created successfully but ends in the Abandon Carts instead. To avoid that, you can connect your Viva Wallet account to a webhook endpoint on our side to make sure that orders are always processed successfully.
Before creating a webhook, make sure that you have saved correct "Merchant ID" and "API Key" into Viva Wallet app inside your store.
-
Navigate to "Settings" -> "API Access" -> "Webhooks"

-
Click on "Create Webhook"
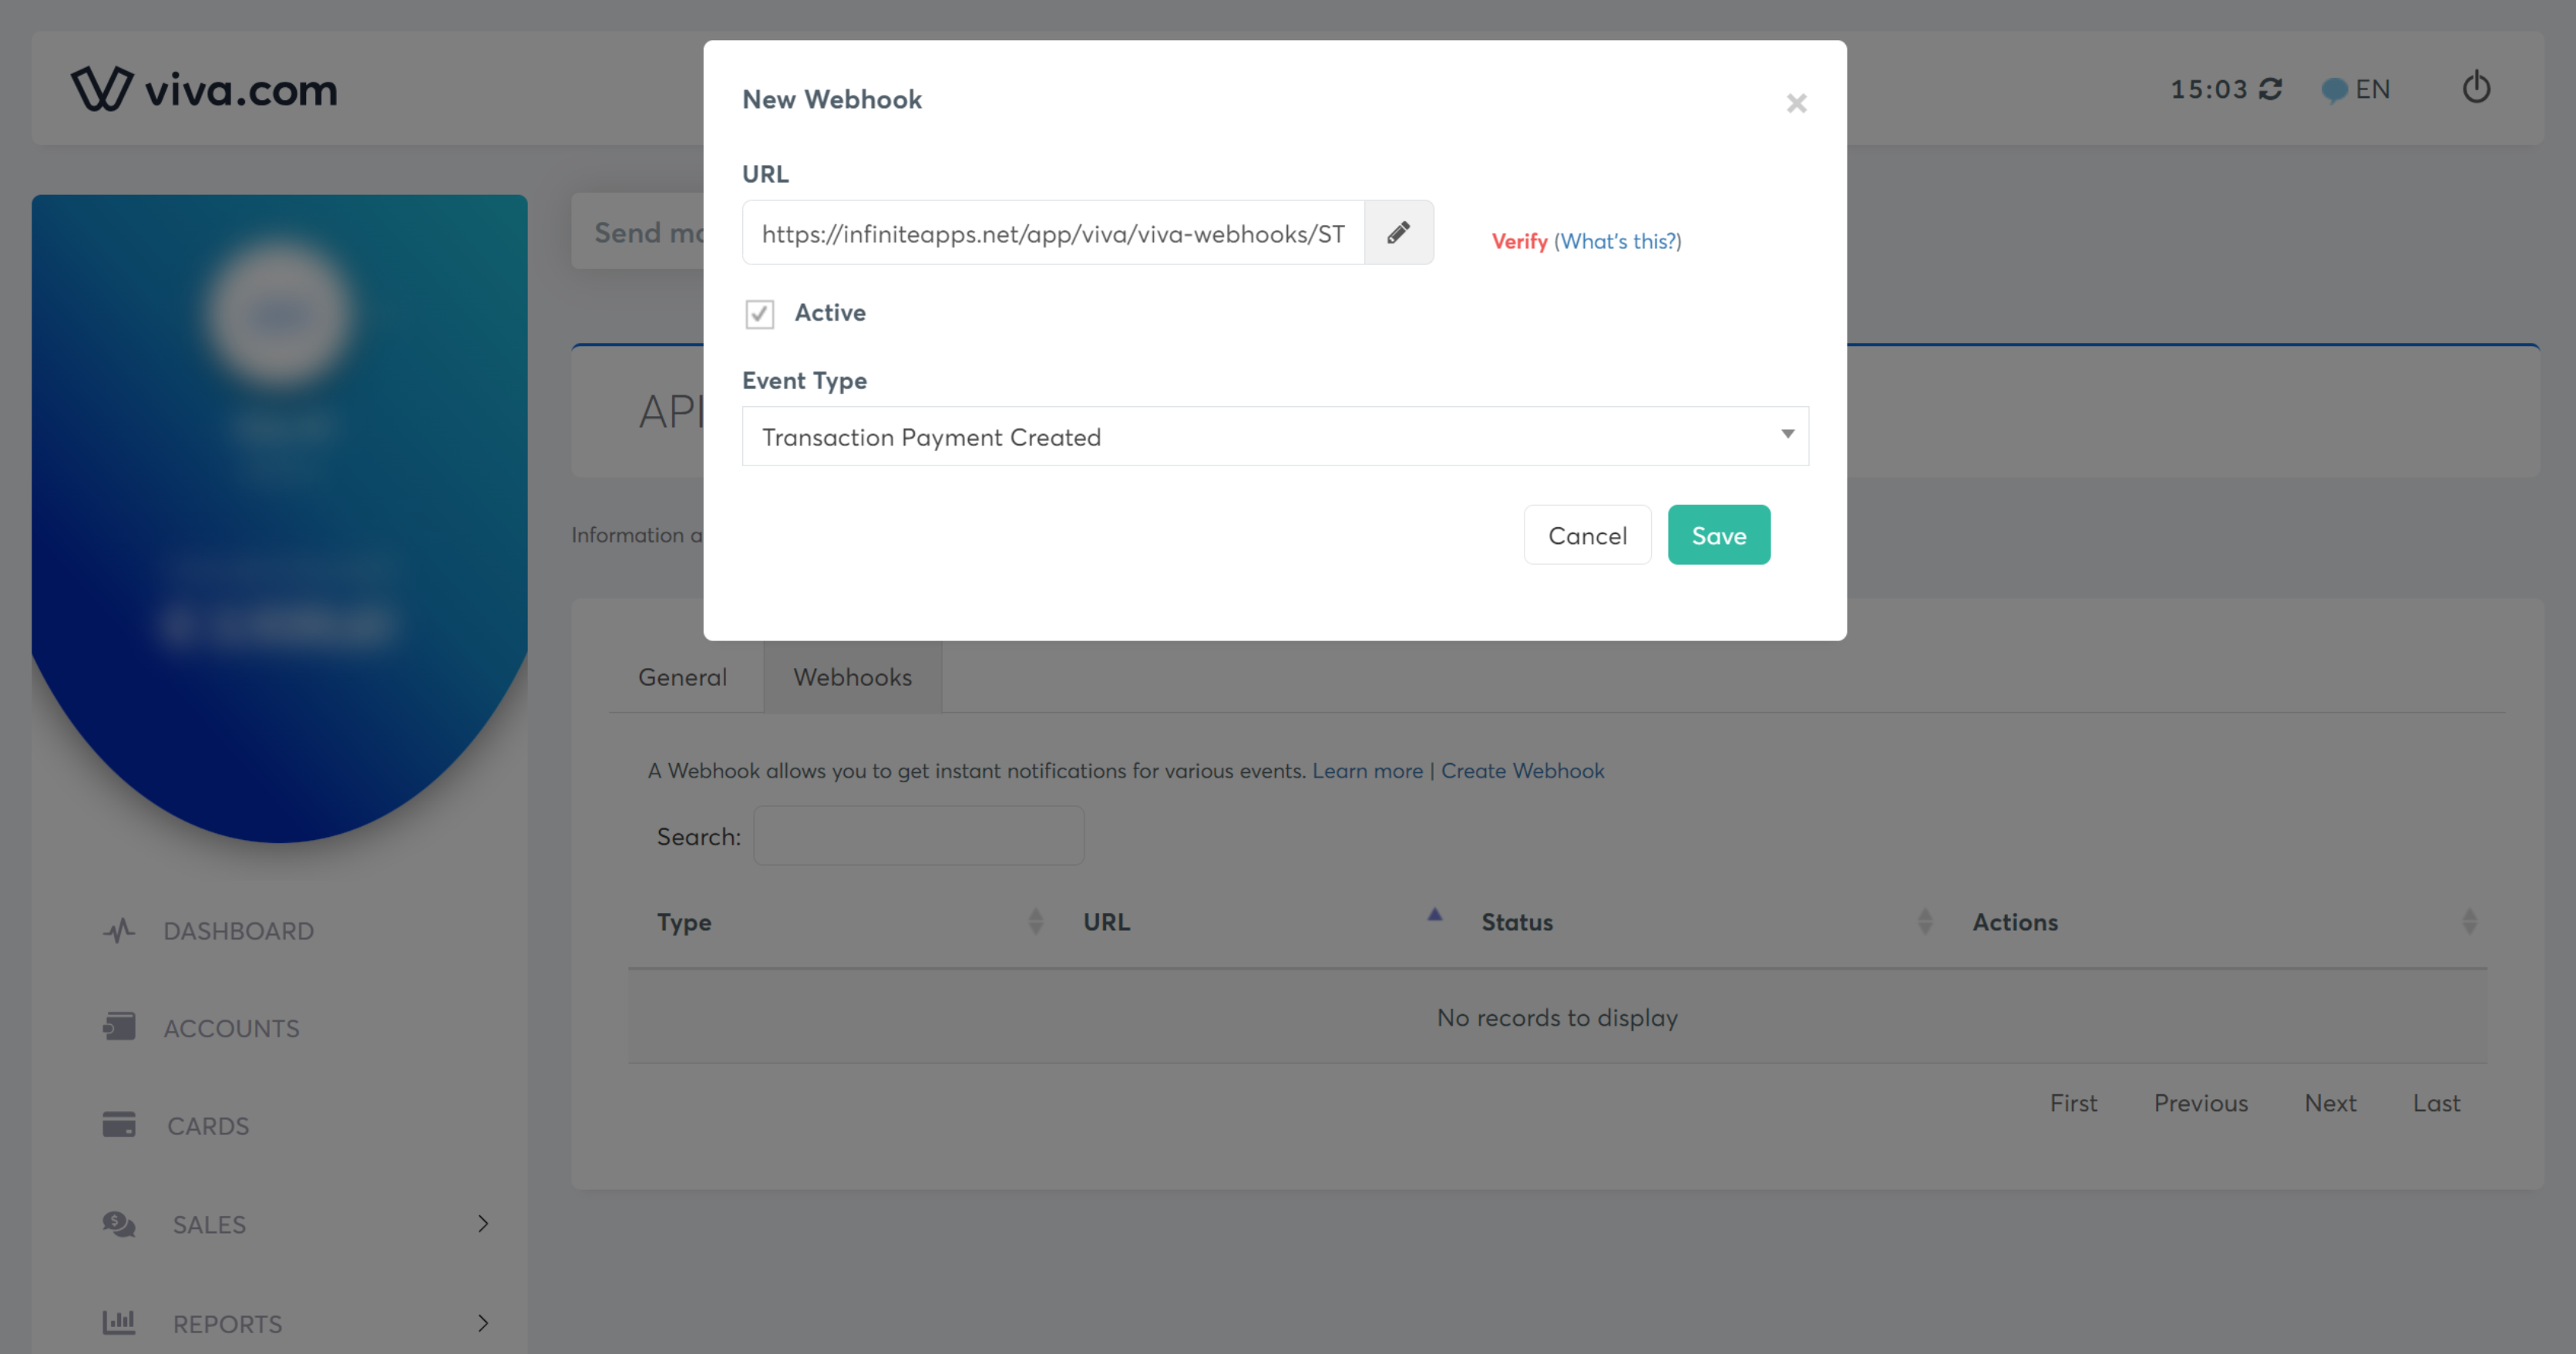
- Fill in the URL as "https://infiniteapps.net/app/viva/viva-webhooks/[STOREID]", replace "[STOREID]" with your actual store ID.
- Tick "Active" checkbox
- Select "Transaction Payment Created" for "Event Type"
- Click "Save"
- You are all set